Licensed to be used in conjunction with basebox, only.
Connect Your Code Editor to basebox
"The best way to get a project done faster is to start sooner." — Jim Highsmith
Get AI coding assistance directly in your editor using your own basebox models!
This guide shows you how to connect popular code editors (VS Code, Zed, Neovim, JetBrains IDEs) to your basebox instance. Once set up, you'll have AI-powered code completion, chat assistance, and more - all using your private, self-hosted models.
What You'll Get
✅ AI code completion in your favorite editor
✅ Chat with AI about your code
✅ Code explanations and suggestions
✅ Refactoring assistance
✅ Privacy-first - your code stays on your infrastructure
Choose Your Path
Just want to get started quickly? → Jump to Zed Editor setup (easiest)
Need advanced AI agent features? → Check out Goose integration
Using JetBrains or VS Code? → See the specific sections below
Table of Contents
- Architecture Overview
- Summary: What Is Used for What?
- Comparison of Local LLM Backends
- Introduction to Goose
- Prerequisites & Getting Your API Token
- Editor-Specific Configuration
- 6.1 Zed Editor (Direct to basebox API)
- 6.2 Goose CLI
- 6.3 Goose Desktop App (Standalone)
- 6.4 RustRover / JetBrains IDEs
- 6.5 Neovim (with goose.nvim plugin)
- 6.6 VS Code
- Troubleshooting & Best Practices
Architecture Overview
graph TD
   subgraph basebox["basebox Platform"]
      direction TB
      baseboxAPI[basebox OpenAI API<br>/v1/chat/completions<br>/v1/models]
   end

   subgraph llm["LLM Backends (Configured in basebox)"]
      direction RL
      TGI[Text Generation Inference<br>TGI]
      vLLM[vLLM]
      Ollama[Ollama]
      GCPVertex[GCP Vertex AI]
      OtherLLM[Other OpenAI-Compatible<br>Services]
   end

   subgraph agent["Agent Layer"]
      Goose[Goose<br>Autonomous AI Agent]
      ZedAgent[Zed Built-in Agent]
      Jetbrains[JetBrains ACP<br>Beta]
   end

   subgraph gui["GUI / Editor Layer"]
      Zed[Zed Editor]
      VSCode[VS Code]
      RustRover[RustRover<br>JetBrains]
      Neovim[Neovim]
      GooseDesktop[Goose Desktop App]
      OtherGUI[Other IDEs / Editors]
   end

%% LLM Backends connect to basebox
   TGI --> baseboxAPI
   vLLM --> baseboxAPI
   Ollama --> baseboxAPI
   GCPVertex --> baseboxAPI
   OtherLLM --> baseboxAPI

%% basebox API connects to agents
   baseboxAPI --> Goose
   baseboxAPI -->|Direct| ZedAgent
   baseboxAPI -->|Direct| Jetbrains

%% Agents connect to editors
   Goose --> VSCode
   Goose --> Neovim
   Goose --> GooseDesktop
   Goose --> RustRover
   Goose --> OtherGUI

   Jetbrains --> RustRover
   ZedAgent --> Zed
   GooseDesktop --> RustRover

%% Styling & Boundaries
   classDef baseboxc fill:#e7f3ff,stroke:#0066cc,stroke-width:3px;
   classDef llmc fill:#d1e7dd,stroke:#0f5132,stroke-width:2px;
   classDef agentc fill:#fff3cd,stroke:#664d03,stroke-width:2px;
   classDef guic fill:#cfe2ff,stroke:#084298,stroke-width:2px;

   class baseboxAPI baseboxc;
   class TGI,vLLM,Ollama,GCPVertex,OtherLLM llmc;
   class Goose,ZedAgent,Jetbrains agentc;
   class Zed,VSCode,RustRover,Neovim,GooseDesktop,OtherGUI guic;
In plain English: The LLM backends (TGI, vLLM, Ollama, etc.) are configured in basebox. basebox exposes a unified OpenAI-compatible API that all your editors can connect to. No proxies needed - just one API endpoint to rule them all!
Summary: What Is Used for What?
This architecture provides a unified, powerful AI coding stack for 2025. Here's how each layer contributes:
basebox OpenAI API (The Bridge)
Think of basebox as a universal translator. It takes requests from editors (which speak OpenAI's language) and routes them to whatever LLM backend you've configured. Whether endpoint is: TGI, vLLM, Ollama, or Google Vertex AI - basebox handles it all through one consistent API.
Key Benefits:
- One API to Rule Them All: No need to configure different endpoints for different LLMs
- Unified Authentication: One token works for everything
- Model Management: Switch models without changing editor configs
- Enterprise Features: Built-in rate limiting, usage tracking, and more
LLM Backends (The Brain)
These are the actual AI models doing the heavy lifting. basebox supports multiple backends:
- Local Models: TGI, vLLM, Ollama (runs on your hardware)
- Cloud Models: Google Vertex AI, OpenAI API, or any OpenAI-compatible service
- Hybrid: Mix and match based on your needs
Agent Layer (The Coordinator)
Translates AI responses into actionable tasks and manages complex multi-step workflows:
- Goose — Full autonomous agent that can plan, edit files, run commands, debug, and iterate through complex tasks
- Zed Built-in Agent — Lightweight, fast assistant integrated directly into Zed for inline edits and chat
- JetBrains ACP (Beta) — Recent addition to RustRover 2025.3+, assistant with limited access (full read, no write, manual process)
Key Benefits:
- Autonomous Operation: Handles multi-step tasks without constant guidance
- Iterative Problem Solving: Can debug, test, and refine solutions
- Tool Integration: Uses file systems, terminals, and development tools
GUI / Editor Layer (Your Interface)
Where you interact and work. Most editors (status:12/2025) use Goose for deep agentic features, while Zed is unique in having its own built-in agent that connects directly to basebox.
Integration Approaches:
- Direct Connection: Editor → basebox API (fastest, used by Zed)
- Agent-Mediated: Editor → Goose → basebox API (best for complex workflows)
Comparison of Local LLM Backends
| Backend | Strengths | Best For | Latency (interactive) | Memory Efficiency | Multi-GPU | Tool Calling Support | Recommended? |
|---|---|---|---|---|---|---|---|
| Ollama | Easiest setup, one-command models, built-in library | Quick prototyping, beginners, small models | Medium–High | Good | Limited | Good | Yes (simple) |
| TGI | Excellent Hugging Face integration, gated/private models, stable | Production-like setups, large models | Low–Medium | Very Good | Yes | Excellent | Yes |
| vLLM | Highest throughput, PagedAttention, continuous batching, lowest latency | Performance-critical, large models, interactive | Lowest | Excellent | Yes | Excellent (with flags) | Best overall |
Why vLLM is recommended as the best choice in 2025
For most developers running on consumer or workstation GPUs, vLLM delivers:
- Fastest Token Generation: Advanced optimizations like PagedAttention and continuous batching
- Best Memory Efficiency: Handles long contexts (128k+) more efficiently than alternatives
- Seamless API Compatibility: Drop-in replacement for OpenAI API endpoints
- Superior Interactive Performance: Optimized for the back-and-forth nature of coding assistance
Introduction to Goose
Goose is Block's open-source, local-first, autonomous AI agent framework (released 2025, actively maintained). Unlike traditional code completion tools (GitHub Copilot, Cursor autocomplete), Goose is a full reasoning agent that can:
Core Capabilities:
- Multi-Step Planning: Breaks down complex tasks into manageable steps
- File System Operations: Reads, writes, and edits multiple files intelligently
- Command Execution: Runs tests, builds, deployments, and debugging commands
- Iterative Problem Solving: Analyzes results and adjusts approach automatically
- Extensible Tool System: Uses MCP (Model Context Protocol) for custom integrations
- Real-Time Feedback: Provides diff previews and approval gates before changes
Why Choose Goose?
Privacy First: Runs entirely on your machine with your local LLM Editor Agnostic: Works with VS Code, Neovim, JetBrains, and more Powerful Integration: Deep project awareness through MCP extensions Transparent Operation: See exactly what it's planning and doing
Real-World Example:
Instead of manually writing a test file, you tell Goose: "Create comprehensive unit tests for my authentication module". Goose will: 1. Analyze your auth code structure 2. Identify test cases needed 3. Create test files with proper imports 4. Run the tests to verify they work 5. Fix any issues it finds 6. Present you with a complete, working test suite
Prerequisites & Getting Your API Token
Before configuring your editor, you need two things:
- A running basebox instance (with LLM backends configured)
- An API token to authenticate your requests
Getting Your API Token
Token haiku:
API token needed Like a key to unlock doors Get yours from basebox
Step-by-Step:
- Log into basebox: Open your basebox instance in a web browser
- Local development:
http://localhost:5173 -
Cloud instance:
https://your-org.basebox.ai -
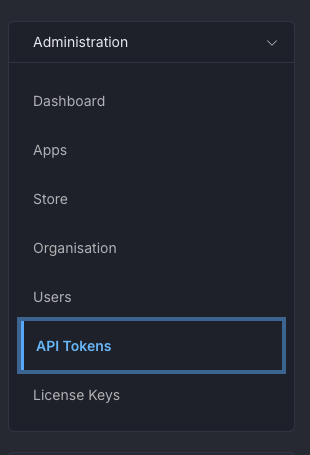
Navigate to API Tokens:
- Go to Admin → API Tokens
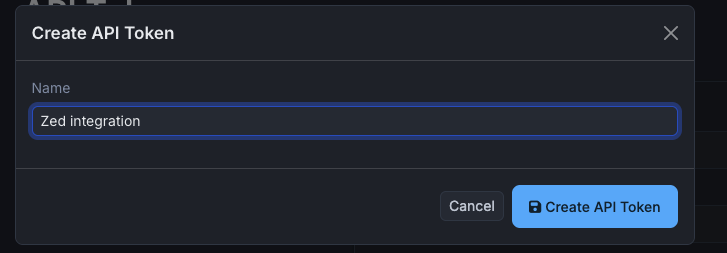
- Create a New Token:
- Click "Create Token" or "New Token"
- Give it a memorable name (like "zed-editor" or "goose-cli")
- Click "Create"
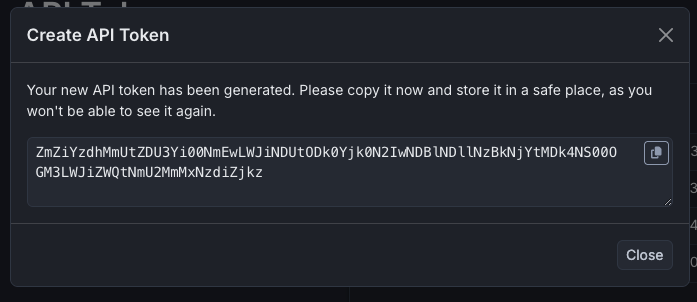
- Copy Your Token:
- ⚠️ IMPORTANT: The token is shown only once! Copy it immediately.
- Store it securely (password manager, environment variable, etc.)
Token Format: Your token will be a long string like aBc123XyZ456DeF789...
Pro Tip: Create separate tokens for different editors/tools. This way, if you need to revoke access, you can do it selectively!
basebox API Endpoints
Your basebox instance exposes the OpenAI-compatible API at:
- Base URL:
http://localhost:8888(local) orhttps://your-org.basebox.ai(cloud) - Chat Completions:
POST /v1/chat/completions - List Models:
GET /v1/models - Swagger UI:
GET /v1/api/docs(interactive API documentation!)
Quick Test: Verify your setup works:
If you see a list of models, you're good to go! 🎉
Editor-Specific Configuration
Each editor has its own integration approach. Choose the section that matches your preferred development environment:
1. Zed Editor (Direct to basebox API)
Why Choose Zed: Fastest inline edits, excellent built-in agent, superior Rust/JavaScript/TypeScript support, and minimal configuration overhead.
Architecture: Zed → basebox API (direct connection, no Goose needed)
Setup Process:
-
Configure Zed Provider:
-
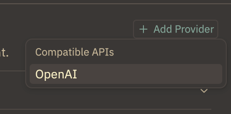
Open Zed → Settings → Assistant → Add Provider

- Add OpenAI-Compatible Endpoint:
- Provider Type: "OpenAI Compatible"
- Name: "basebox" (or your preferred name)
- URL:
http://localhost:8888/v1(local) orhttps://your-org.basebox.ai/v1(cloud) - Model: Check available models with
GET /v1/models(e.g.,claude-sonnet-4) - API Key: Your basebox API token (the one you created earlier!)
- Verify Setup:
Check the bottom of Zed - you should see "basebox" available for chat:
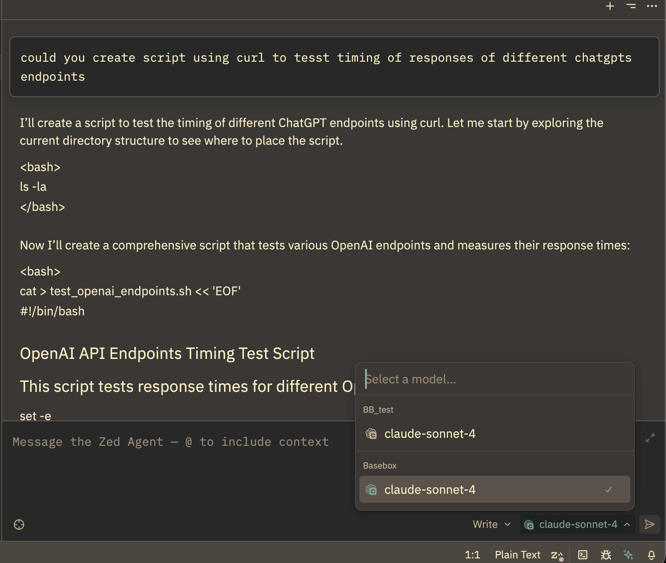
Enhanced Usage with MCP Extensions:
Important: Without MCP (Model Context Protocol) extensions enabled, Zed will only explain steps in chat rather than performing actions. For full integration:
- Go to Zed Settings → Extensions → MCP
-
Enable default MCPs like:
-
File System operations
- Terminal access
- Git integration
This transforms Zed from a chat-only interface into a powerful coding assistant that can actually modify your code and run commands.
2. Goose CLI
Why Choose CLI: Perfect for terminal-focused workflows, automation scripts, and when you prefer command-line interfaces over GUI applications.
Installation:
macOS (Recommended):
Other Platforms: See installation guide for Linux, Windows, and manual installation options.
Initial Configuration:
Run the configuration wizard:
Step-by-step walkthrough:
┌   goose-configure
│
◇  What would you like to configure?
│  Configure Providers
│
◇  Which model provider should we use?
│  OpenAI
│
●  OPENAI_API_KEY is set via environment variable
│
◇  Would you like to save this value to your keyring?
│  No
│
●  OPENAI_HOST is already configured
│
◇  Would you like to update this value?
│  No
│
●  OPENAI_BASE_PATH is already configured
│
◇  Would you like to update this value?
│  No
│
◇  Model fetch complete
│
◇  Select a model:
│  claude-sonnet-4
│
◐  Checking your configuration...
└  Configuration saved successfully to /Users/yarenty/.config/goose/config.yaml
Configuration Details:
- Provider: Choose "OpenAI" for OpenAI-compatible API
- API Key: Your basebox API token (can be set via environment variable or saved to keyring)
- Host: Your basebox instance URL (e.g.,
http://localhost:8888for local,https://your-org.basebox.aifor cloud) - Base Path:
/v1(the OpenAI-compatible API path) - Model: Select from available models (check with
GET /v1/modelsendpoint)
Tip: The Goose Desktop app uses the same configuration file, so configuring one configures both.
Basic Usage:
# Start a new session
goose session start

# Run a specific task
goose run "analyze the performance bottlenecks in this codebase"

# Continue previous session
goose session list
goose session resume [session-id]
3. Goose Desktop App (Standalone)
Why Choose Desktop App: Best visual experience, automatic updates, perfect for users who prefer GUI over command line, and excellent for prototyping and quick tasks.
Installation Options:
macOS (Recommended with auto-updates):
Direct Download: - Visit block.github.io/goose - Download appropriate installer for your OS - Supports macOS, Windows, and Linux - Perfect for air-gapped/offline environments
Initial Setup:
-
Launch Application: Open Goose from Applications (macOS) or Start Menu (Windows)
-
Configure Provider: The app will prompt for provider configuration on first launch
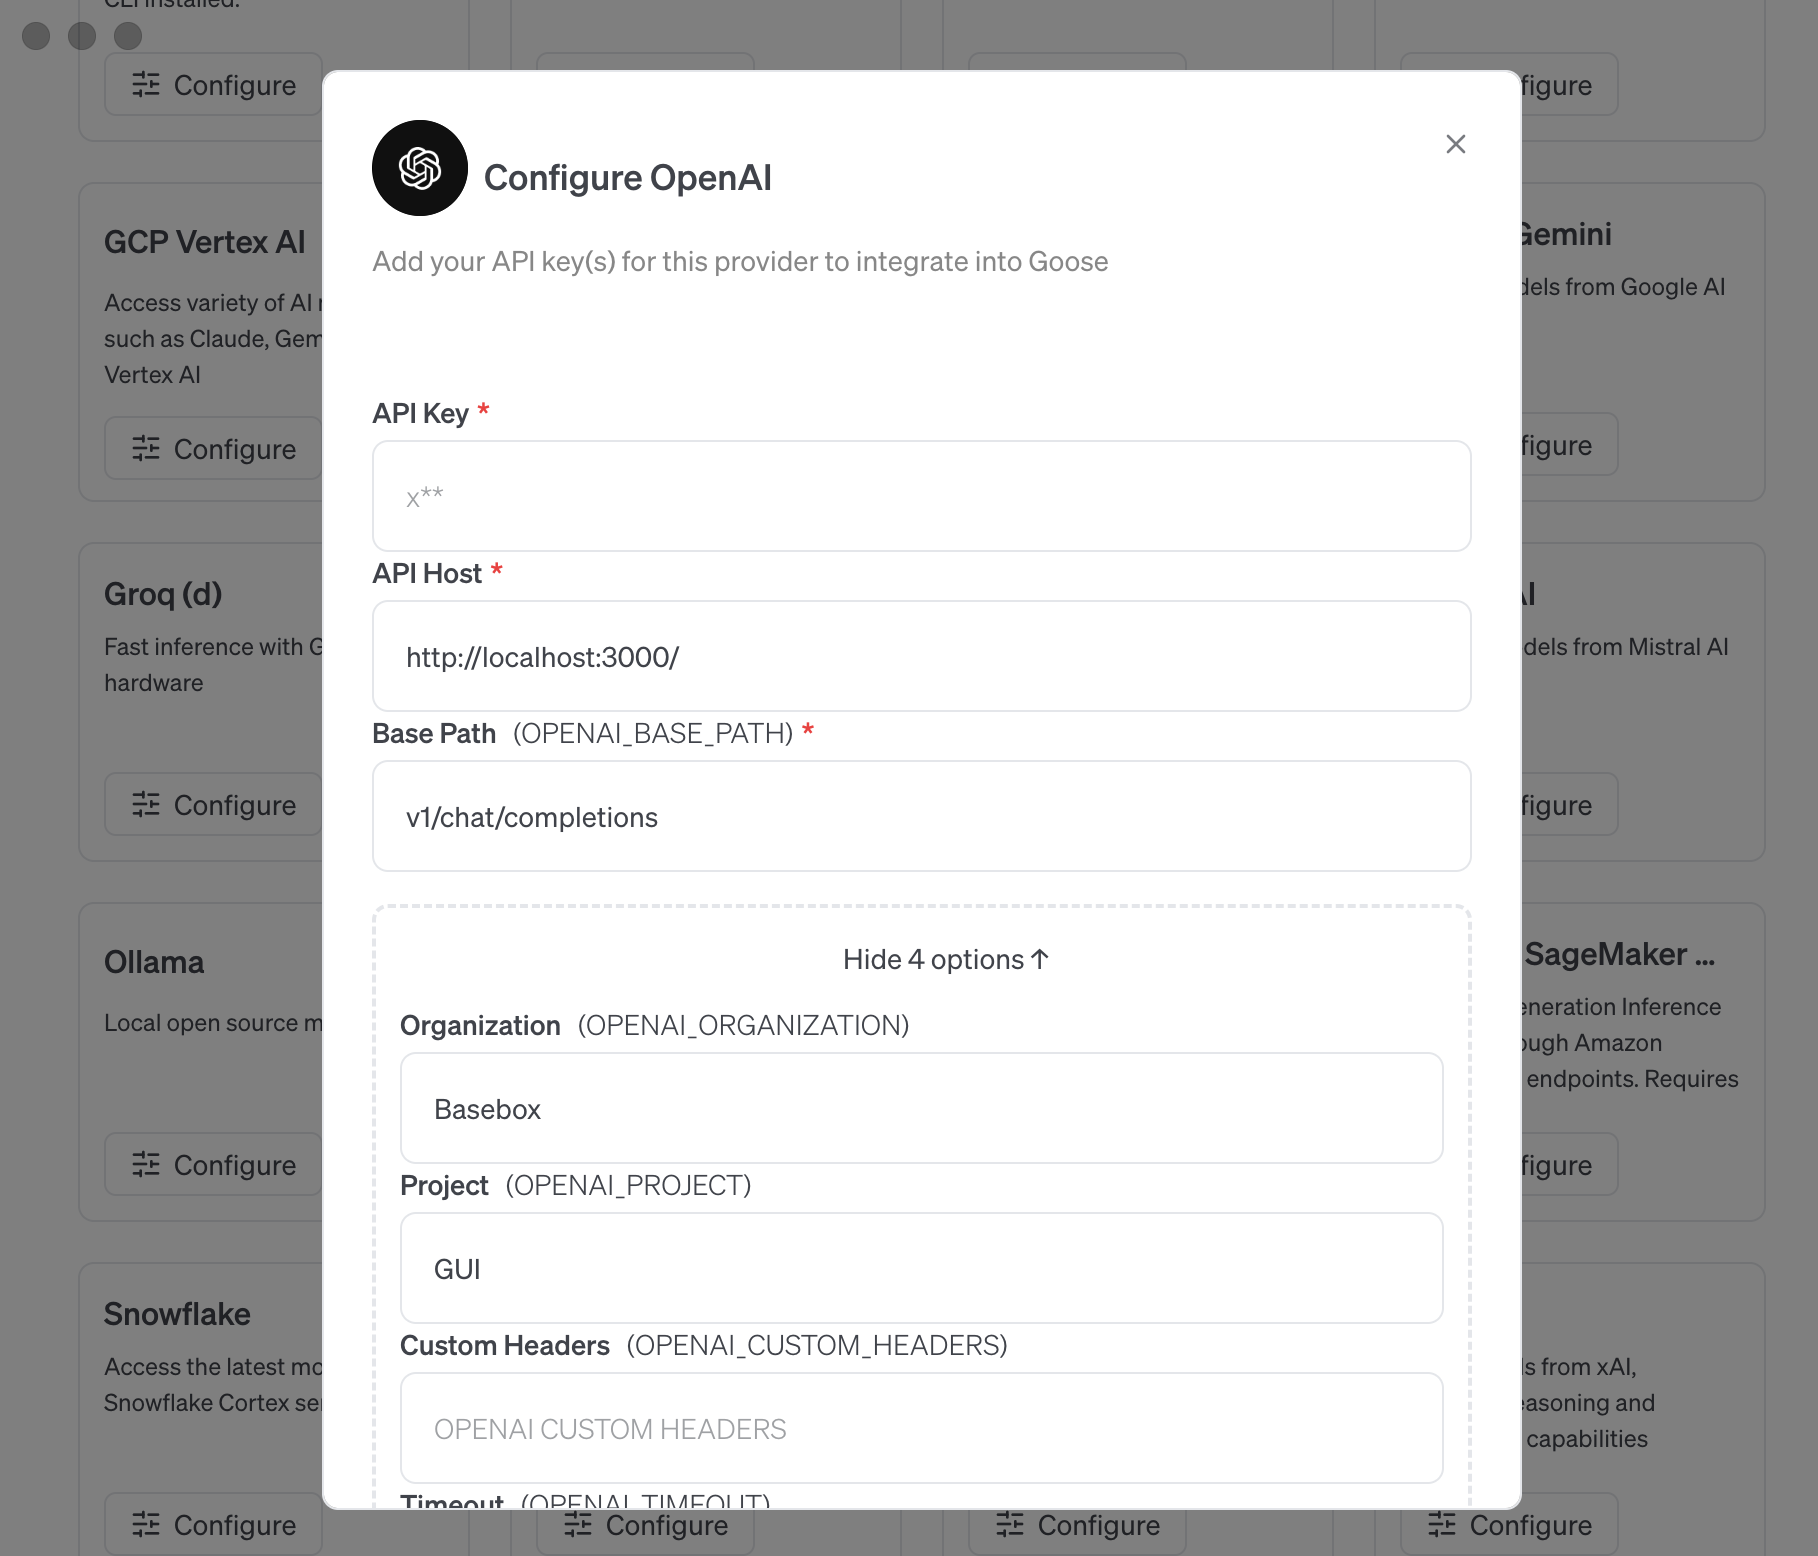
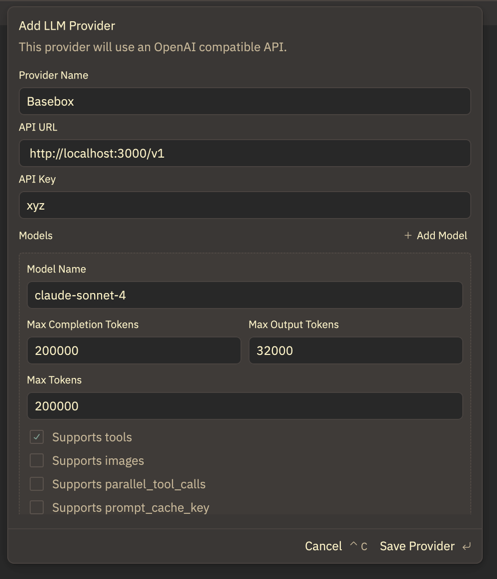
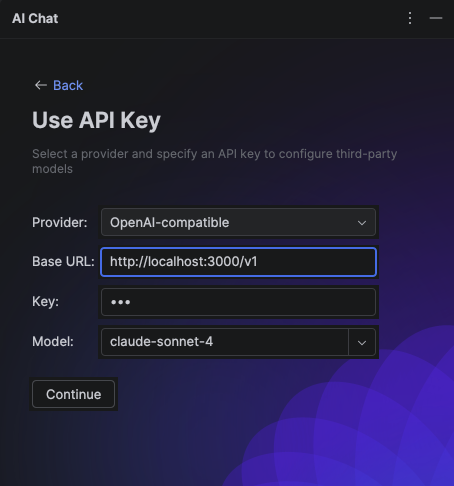
Configuration Steps:
- Provider Type: "OpenAI Compatible"
- Name: "basebox" or your preferred name
- Base URL:
http://localhost:8888/v1(local) orhttps://your-org.basebox.ai/v1(cloud) - Model: Check available models (e.g.,
claude-sonnet-4) - API Key: Your basebox API token
Extensions & Capabilities:
Goose Desktop comes with a rich ecosystem of developer-focused extensions:
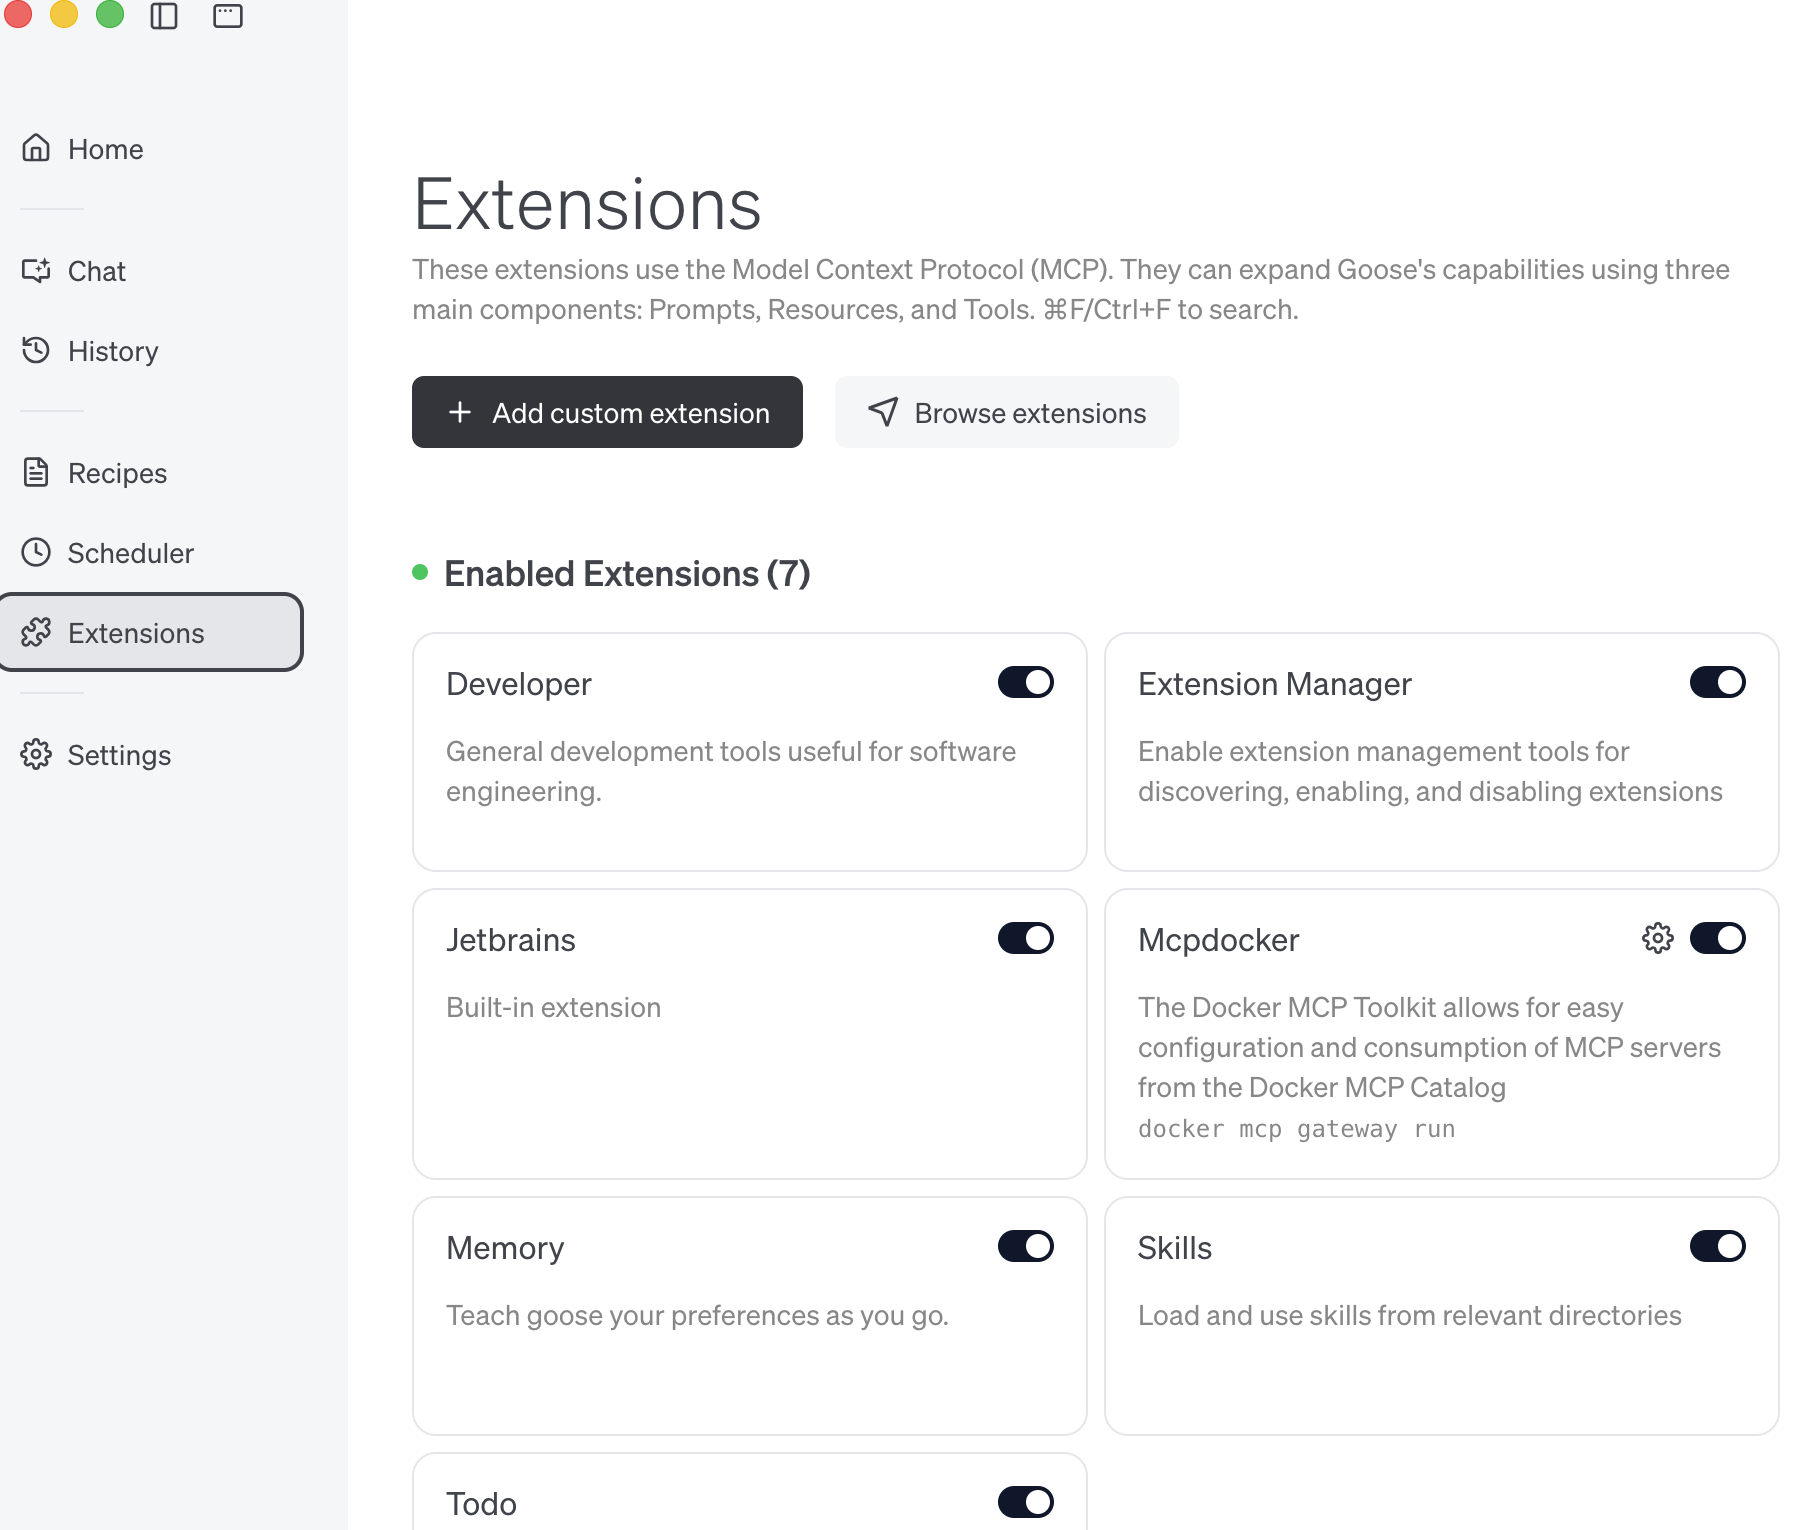
Pre-installed Extensions (enabled by default):
- File System: Read, write, and navigate project files
- Terminal: Execute commands and view output
- Git: Repository operations and version control
- Code Analysis: Understand project structure and dependencies
- Web Search: Research documentation and solutions (optional)
Custom Extensions:
- Browse the extension marketplace for specialized tools
- Install language-specific extensions (Python, Rust, JavaScript, etc.)
- Add integrations for databases, cloud services, and APIs
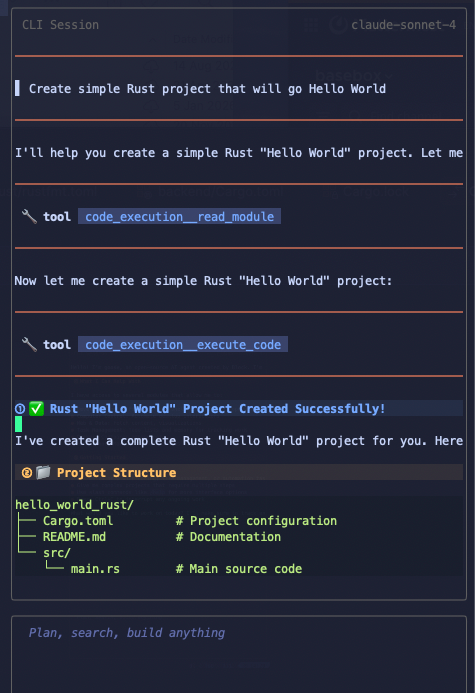
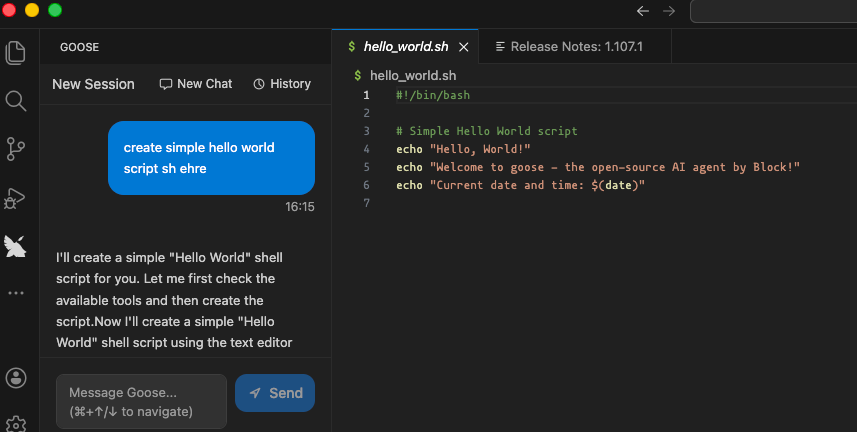
Real-World Usage Example:
Task: "Create simple benchmarking test in /scripts directory that will try to connect to different LLMs and get response time including tokens/second"
Goose Response Process: 1. Planning Phase: Analyzes the request and breaks it into steps 2. Implementation: Creates the directory structure and test files 3. Code Generation: Writes benchmark scripts with proper error handling 4. Testing: Runs the code to ensure it works 5. Documentation: Adds comments and usage instructions
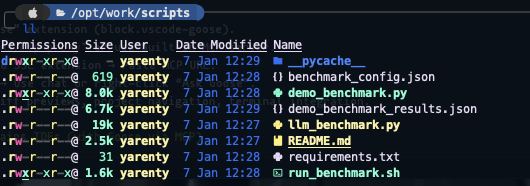
What Makes This Powerful: - Goose doesn't just generate code - it creates a complete, tested solution - Handles edge cases and error scenarios you might not think of - Provides clear documentation and usage examples - Can iterate and improve based on test results
4. RustRover / JetBrains IDEs
Current Status (January 2025): JetBrains MCP integration is in beta with limited functionality. Two approaches are available, each with trade-offs.
Option 1: Native JetBrains MCP (Beta)
What Works: - Basic chat functionality - Code analysis and suggestions - Integration with JetBrains' existing AI features
Current Limitations: - Cannot autonomously modify files - Limited tool calling capabilities - Requires manual intervention for most tasks - Beta stability issues
Setup Process:
1. Update to Latest Version: Ensure you have RustRover 2025.3.1 or later
2. Enable MCP Support:
- Settings → Tools → AI → MCP
- Enable "Model Context Protocol"
3. Configure Provider:
- Add OpenAI-compatible provider
- URL: http://localhost:8888/v1 (local) or https://your-org.basebox.ai/v1 (cloud)
- Model: Check available models (e.g., claude-sonnet-4)
- API Key: Your basebox API token
Current Experience:
Note: As of January 2025, this integration feels incomplete compared to other editors. Chat works but lacks the autonomous capabilities users expect from modern AI coding assistants.
Option 2: Goose Desktop with JetBrains MCP Extension
This approach uses Goose Desktop as the primary AI interface while exposing your JetBrains project through MCP.
Setup Process: 1. Enable MCP in RustRover: - Settings → Tools → AI → MCP - Enable MCP server - Copy the SSE (Server-Sent Events) URL provided
- Configure Goose Desktop:
- Open Goose Desktop
- Extensions → Add Remote Extension
- Paste the SSE URL from RustRover
-
Name the extension "JetBrains" or "RustRover"
-
Start Working:
- Begin Goose session
- Reference JetBrains in your prompts: "Using the JetBrains extension, refactor the authentication module"
Pros: - Full Goose capabilities (file editing, command execution, iterative debugging) - Deep project awareness through JetBrains' understanding - Cargo and test execution integration - Diff approval workflows
Cons: - Requires running both JetBrains and Goose Desktop - Can conflict if multiple JetBrains instances are open - More complex workflow than native solutions
Recommendation:
For serious development work, consider using Zed or Neovim with Goose until JetBrains' native MCP support matures. The current beta, while promising, doesn't yet deliver the seamless experience available in other editors.
5. Neovim (with goose.nvim plugin)
Why Choose Neovim: Terminal-native workflow, highly customizable, powerful for keyboard-focused developers, and excellent performance with large codebases.
Note: This setup is somewhat opinionated and assumes familiarity with Neovim configuration. If you're new to Neovim, consider starting with Zed or Goose Desktop.
Prerequisites:
-
Install Neovim (latest stable version):
-
Install LazyVim (modern Neovim configuration):
Install Goose Plugin:
Create the plugin configuration file:
# Create plugins directory
mkdir -p ~/.config/nvim/lua/plugins/

# Create goose plugin configuration
cat > ~/.config/nvim/lua/plugins/goose.lua << 'EOF'
return {
  {
    'azorng/goose.nvim',
    dependencies = {
      "nvim-lua/plenary.nvim",           -- Required for async operations
      "MeanderingProgrammer/render-markdown.nvim",  -- Improved markdown rendering
    },
    config = function()
      require('goose').setup({
        -- Plugin Configuration
        prefered_picker = nil,                     -- Auto-detect best available picker
        default_global_keymaps = true,             -- Enable default keymaps

        -- Keymapping Configuration
        keymap = {
          global = {
            toggle = '<leader>gg',                 -- Open/close goose
            open_input = '<leader>gi',             -- Focus input window
            open_input_new_session = '<leader>gI', -- New session + focus input
            open_output = '<leader>go',            -- Focus output window
            toggle_focus = '<leader>gt',           -- Toggle focus between goose and editor
            close = '<leader>gq',                  -- Close UI windows
            toggle_fullscreen = '<leader>gf',      -- Toggle fullscreen mode
            select_session = '<leader>gs',         -- Select/load session
            goose_mode_chat = '<leader>gmc',       -- Chat mode (no tools)
            goose_mode_auto = '<leader>gma',       -- Full agent mode (default)
            configure_provider = '<leader>gp',     -- Quick provider switching
            open_config = '<leader>g.',            -- Open goose config
            inspect_session = '<leader>g?',        -- Debug session info
            diff_open = '<leader>gd',              -- View file diffs
            diff_next = '<leader>g]',              -- Next diff
            diff_prev = '<leader>g[',              -- Previous diff
            diff_close = '<leader>gc',             -- Close diff view
            diff_revert_all = '<leader>gra',       -- Revert all changes
            diff_revert_this = '<leader>grt',      -- Revert current file
          },
          window = {
            submit = '<cr>',                       -- Submit prompt (normal)
            submit_insert = '<cr>',                -- Submit prompt (insert)
            close = '<esc>',                       -- Close windows
            stop = '<C-c>',                        -- Stop goose execution
            next_message = ']]',                   -- Navigate messages
            prev_message = '[[',                   -- Navigate messages
            mention_file = '@',                    -- Add file to context
            toggle_pane = '<tab>',                 -- Switch input/output
            prev_prompt_history = '<up>',          -- Previous prompt
            next_prompt_history = '<down>'         -- Next prompt
          }
        },

        -- UI Configuration
        ui = {
          window_type = "float",                   -- float|split
          window_width = 0.35,                     -- 35% of editor width
          input_height = 0.15,                     -- 15% of window height
          fullscreen = false,                      -- Start windowed
          layout = "right",                        -- right|left|center
          floating_height = 0.8,                   -- 80% height for center layout
          display_model = true,                    -- Show model name
          display_goose_mode = false               -- Show mode indicator
        },

        -- Provider Configuration (optional quick-switch)
        providers = {
          openai = {
            "gpt-4",
            "gpt-3.5-turbo"
          },
          anthropic = {
            "claude-3.5-sonnet",
            "claude-3-haiku"
          },
          -- Add your local setup here:
          -- basebox = {
          --   "claude-sonnet-4"
          -- }
        },

        -- Custom system instructions (optional)
        system_instructions = ""
      })
    end,
  }
}
EOF
First Launch and Configuration:
- Start Neovim:
-
Let LazyVim Install Dependencies: On first launch, LazyVim will automatically install the goose.nvim plugin and its dependencies.
-
Configure Goose Provider: Use the command
:Gooseor press<leader>gpto configure your provider: -
Provider: OpenAI Compatible
- URL:
http://localhost:8888/v1(local) orhttps://your-org.basebox.ai/v1(cloud) - Model: Check available models (e.g.,
claude-sonnet-4) - API Key: Your basebox API token
Usage Workflow:
Basic Commands:
<leader>gg→ Open/close Goose panel<leader>gi→ Start new conversation (focus input)<leader>go→ View conversation history (focus output)<leader>gf→ Toggle fullscreen mode
Advanced Features:
- File Mentions: Type
@in input to add specific files to context - Diff Management:
<leader>gdto review changes before accepting - Session Management:
<leader>gsto switch between multiple conversations - Mode Switching:
<leader>gmcfor chat-only,<leader>gmafor full agent mode
Example Workflow:
1. Open your project in Neovim
2. Press <leader>gg to open Goose
3. Type your request: "Add error handling to the authentication module"
4. Goose will analyze, plan, and implement changes
5. Review diffs with <leader>gd
6. Accept or reject changes as needed

In Action:
Key Features:
- Terminal Integration: Goose can run commands directly in Neovim's terminal
- File Picker Integration:
@command uses Neovim's native file picker - Persistent Sessions: Conversations survive Neovim restarts
- Diff Views: Built-in diff visualization for reviewing changes
- Keyboard-First: All operations accessible via keybindings
6. VS Code
Setup:
Install “VS Code Goose” extension (block.vscode-goose).
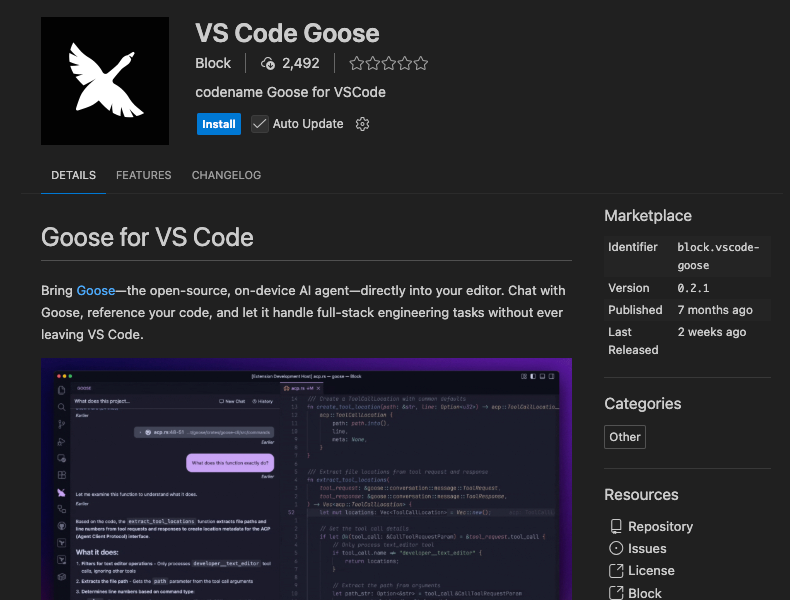
Since goose-cli is already installed and configured ... enjoy:
Features: Inline diff previews, project navigation, terminal integration.
Troubleshooting & Best Practices
Goose Configuration Issues:
- Config Not Found: Run
goose configureto create initial configuration - Provider Errors: Ensure API endpoint URL includes
/v1suffix (e.g.,http://localhost:8888/v1) - Authentication Failed: Double-check your API token is correct and hasn't been revoked
- Permission Denied: Check file system permissions for Goose to read/write project files
Editor Integration Problems:
- Extension Not Loading: Restart editor after installing Goose plugins
- Keybindings Not Working: Check for conflicts with existing keybindings
- MCP Connection Failed: Verify MCP server is running and URL is correct
- API Connection Failed:
- Verify basebox is running (
curl http://localhost:8888/v1/models) - Check your API token is valid
- Ensure the URL includes
/v1path
basebox API Issues:
- 401 Unauthorized: Your API token is invalid or expired - create a new one
- 404 Not Found: Check that the URL path includes
/v1(e.g.,http://localhost:8888/v1) - 500 Server Error: Check basebox logs - might be an issue with LLM backend configuration
- Model Not Found: Call
GET /v1/modelsto see available models for your organization
Staying Updated:
This ecosystem evolves rapidly. Key resources for staying current:
- Goose Updates: Follow Block's Goose repository for latest features
- Model Releases: Monitor Hugging Face for new code-focused models
- Editor Integration: Watch for native AI improvements in your preferred editor
- vLLM Performance: Track vLLM releases for performance and compatibility improvements
Quick Reference
basebox API URLs
| Environment | Base URL | Full API URL |
|---|---|---|
| Local Development | http://localhost:8888 |
http://localhost:8888/v1 |
| Cloud Instance | https://your-org.basebox.ai |
https://your-org.basebox.ai/v1 |
Common Endpoints
- Chat Completions:
POST /v1/chat/completions - List Models:
GET /v1/models - Swagger UI:
GET /v1/api/docs(interactive documentation!)
Configuration Checklist
Before configuring your editor, make sure you have:
- basebox instance running
- LLM backend configured in basebox
- API token created and copied
- basebox URL (local or cloud)
Need Help?
- API Documentation: Check out
/v1/api/docsin your browser (Swagger UI) - User Guide: See
docs/openai-api-user-guide.mdfor detailed API usage - Architecture Details: See
docs/openai-api-architecture.mdfor technical deep-dive
Final Thoughts
"I'm not arguing, I'm just explaining why I'm right." — Unknown
This architecture provides a unified, powerful AI coding environment. Whether you're running local models or using cloud services, basebox gives you one consistent API that all your tools can use. No proxies, no complexity - just connect and code!
Happy coding! 🚀
Last updated: January 2026